Configuring OpenID Authentication
The purpose of this guide is to demonstrate the process of configuring an OpenID Application as an authentication and authorization source.
More information reguarding how OpenID Connect works can be found here:
- https://openid.net/connect/faq/
- https://auth0.com/docs/protocols/openid-connect-protocol
- https://developer.okta.com/blog/2019/10/21/illustrated-guide-to-oauth-and-oidc
Prerequisites
- Either Keycloak has been deployed or an existing Auth0/Okta account exist.
- Auth0 Signup: https://auth0.com/signup
- Okta Signup: https://developer.okta.com/signup/
- Getting started with Keycloak: https://www.keycloak.org/docs/latest/getting_started/
- A value needs generated for
openid-secret. This value will be used to encrypt the OpenID Connect session token.- MacOS/Linux:
openssl rand -base64 25 - Windows: https://activedirectoryfaq.com/2017/08/creating-individual-random-passwords/
- MacOS/Linux:
Auth0 OpenID Connect Application Setup
Creating The Application
- Navigate to the Application management section of your Auth0 dashboard at
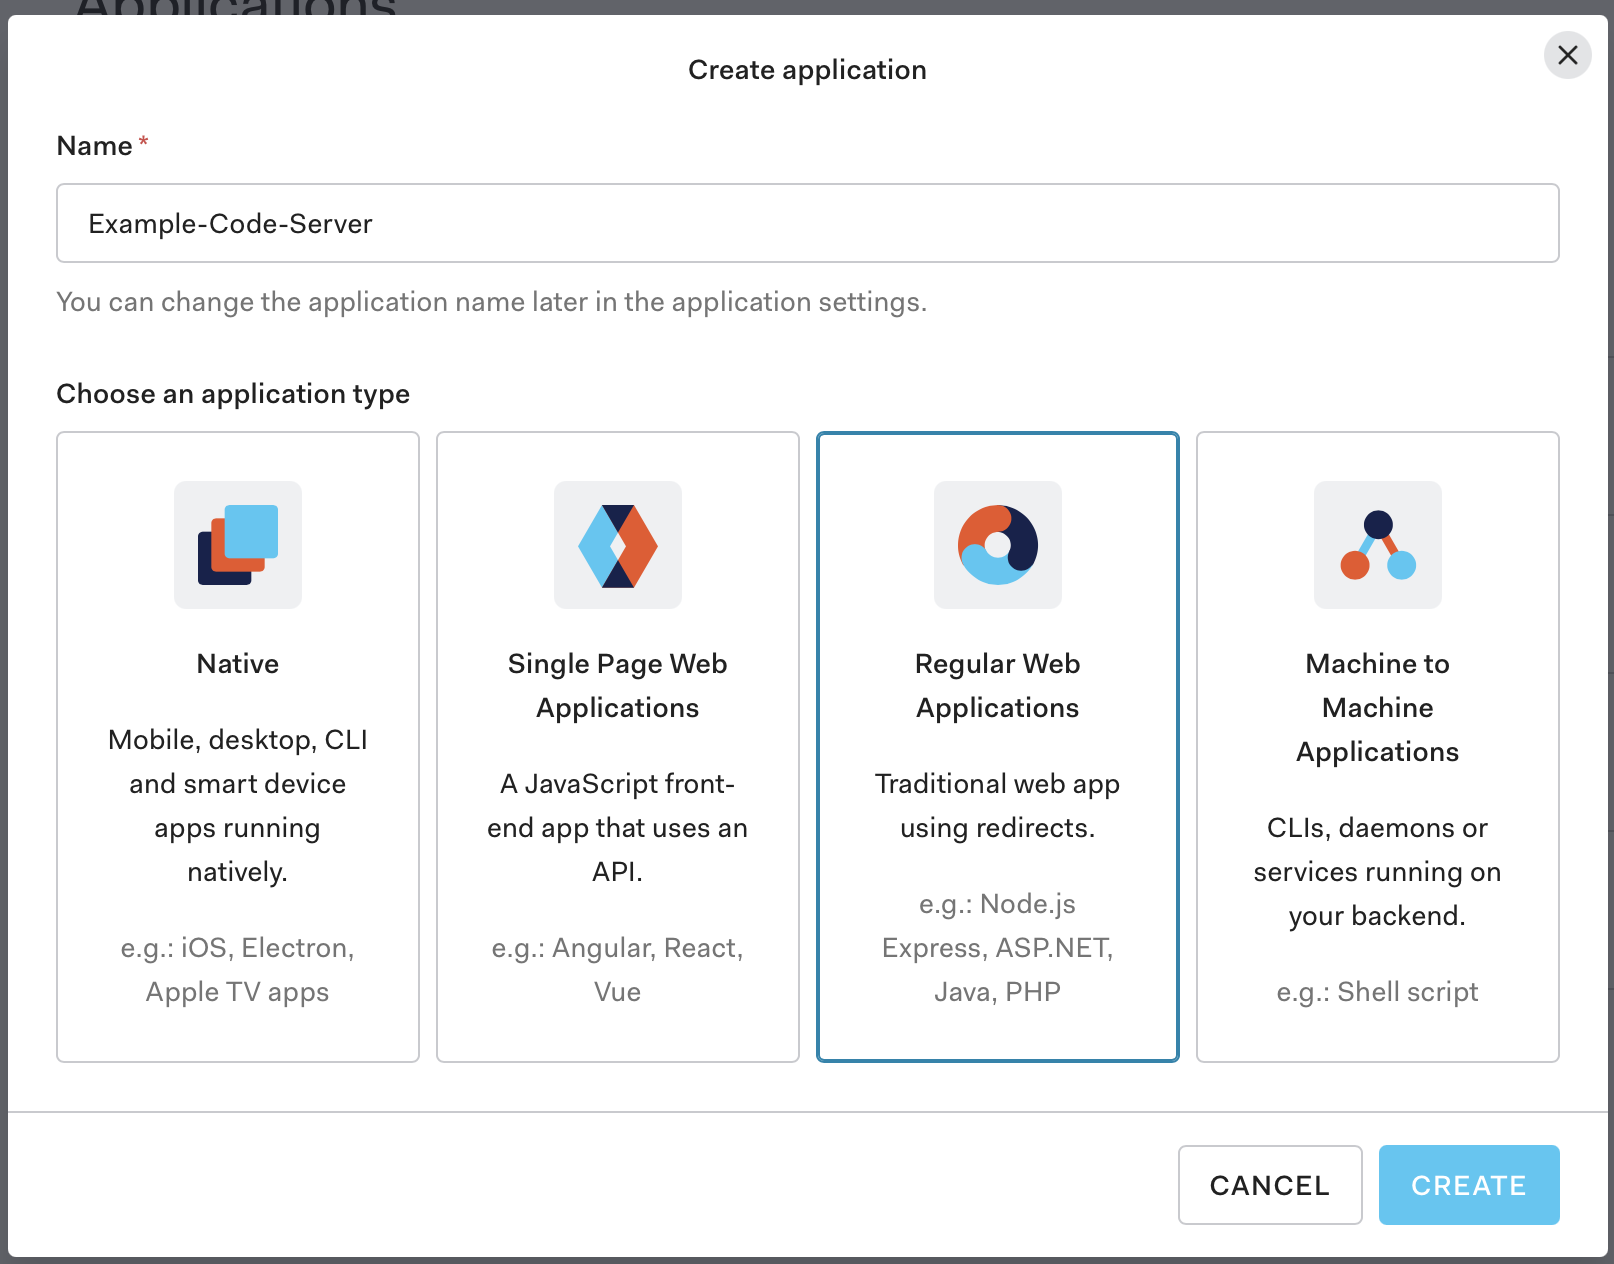
https://manage.auth0.com/dashboard/us//applications - Click the Create Application button in the top right of the page.
- Either provide a name for this application or use the default, then select Regular Web Application as the application type and click the blue Create button.
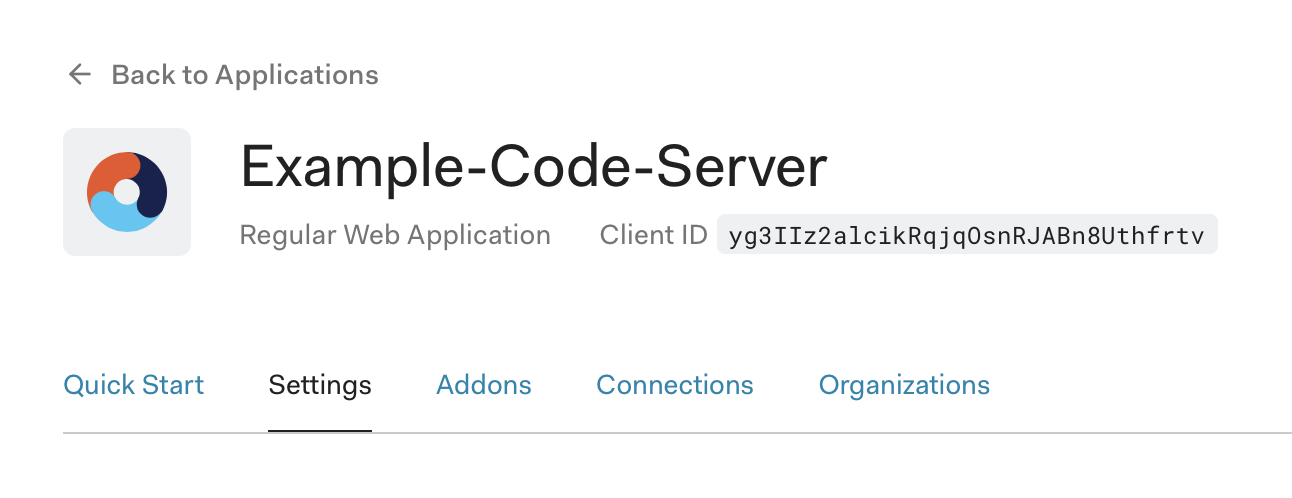
Gather The Client ID
- Make note of the
Client IDvalue. This value will be used in theopenid-client-idconfiguration variable.
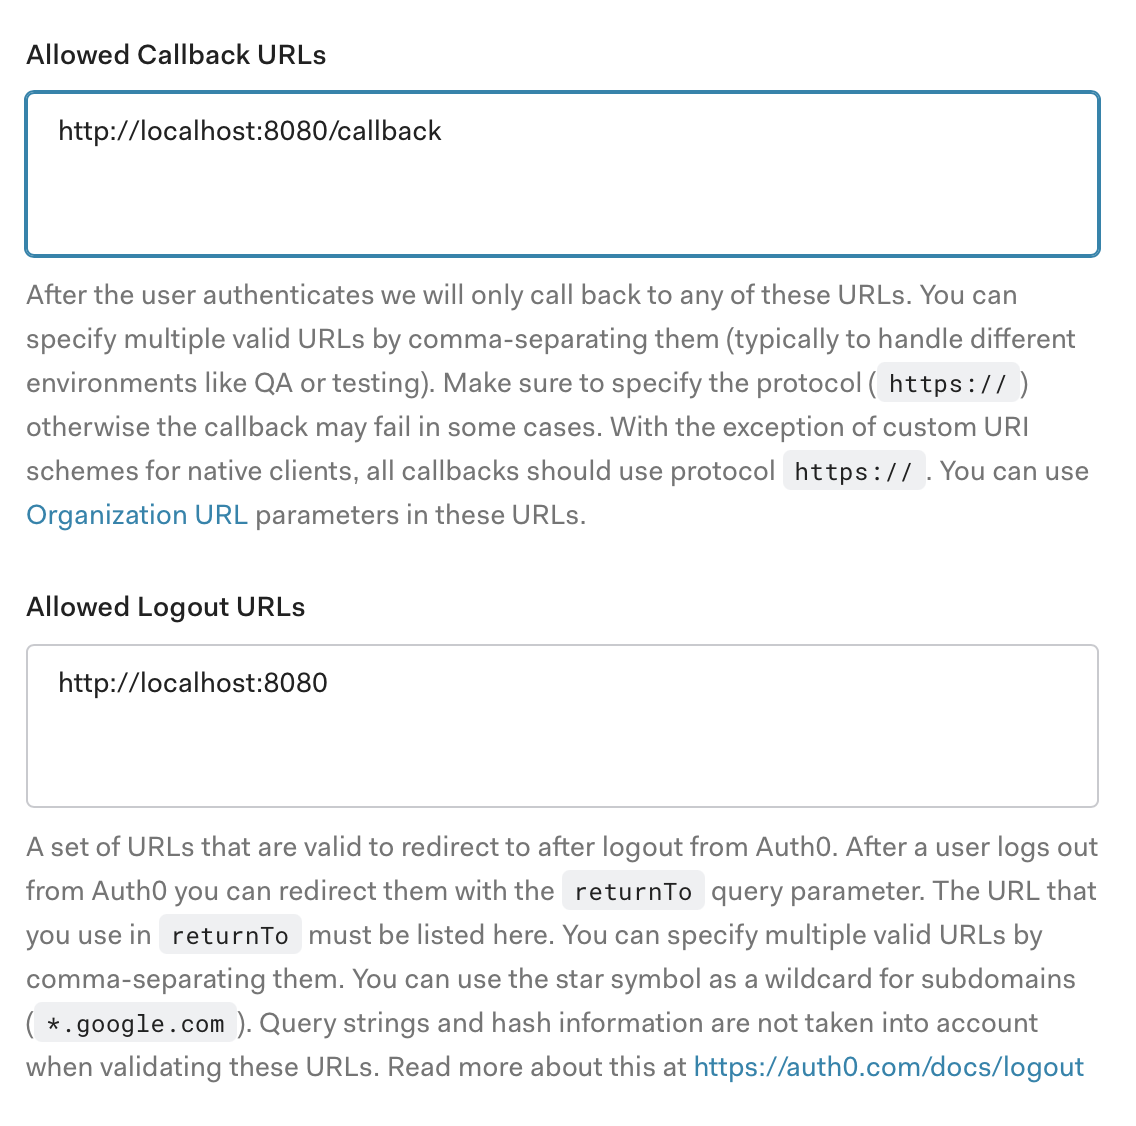
Update the application URLs
- Update the Allowed Callback URL and Allowed Logout URLs fields so that they point to the correct endpoint.
Example Auth0 Configuration
NOTE: The openid-issuer-base-url should be set to the value of the Domain field of the Okta application.
bind-addr: 127.0.0.1:8080
cert: false

auth: openid
openid-issuer-base-url: "https://example.auth0.com"
openid-client-id: "yg3IIz2alcikRqjqOsnRJABn8Uthfrtv"
openid-base-url: "http://localhost:8080"
openid-secret: "{prerequisites_openid-secret_value}"
Okta OpenID Connect Application Setup
Creating The Application
- Navigate to the Add Application page of your Okta dashboard at
https://-admin.okta.com/admin/apps/add-app - Click the Create New App button located in the upper right of the page.
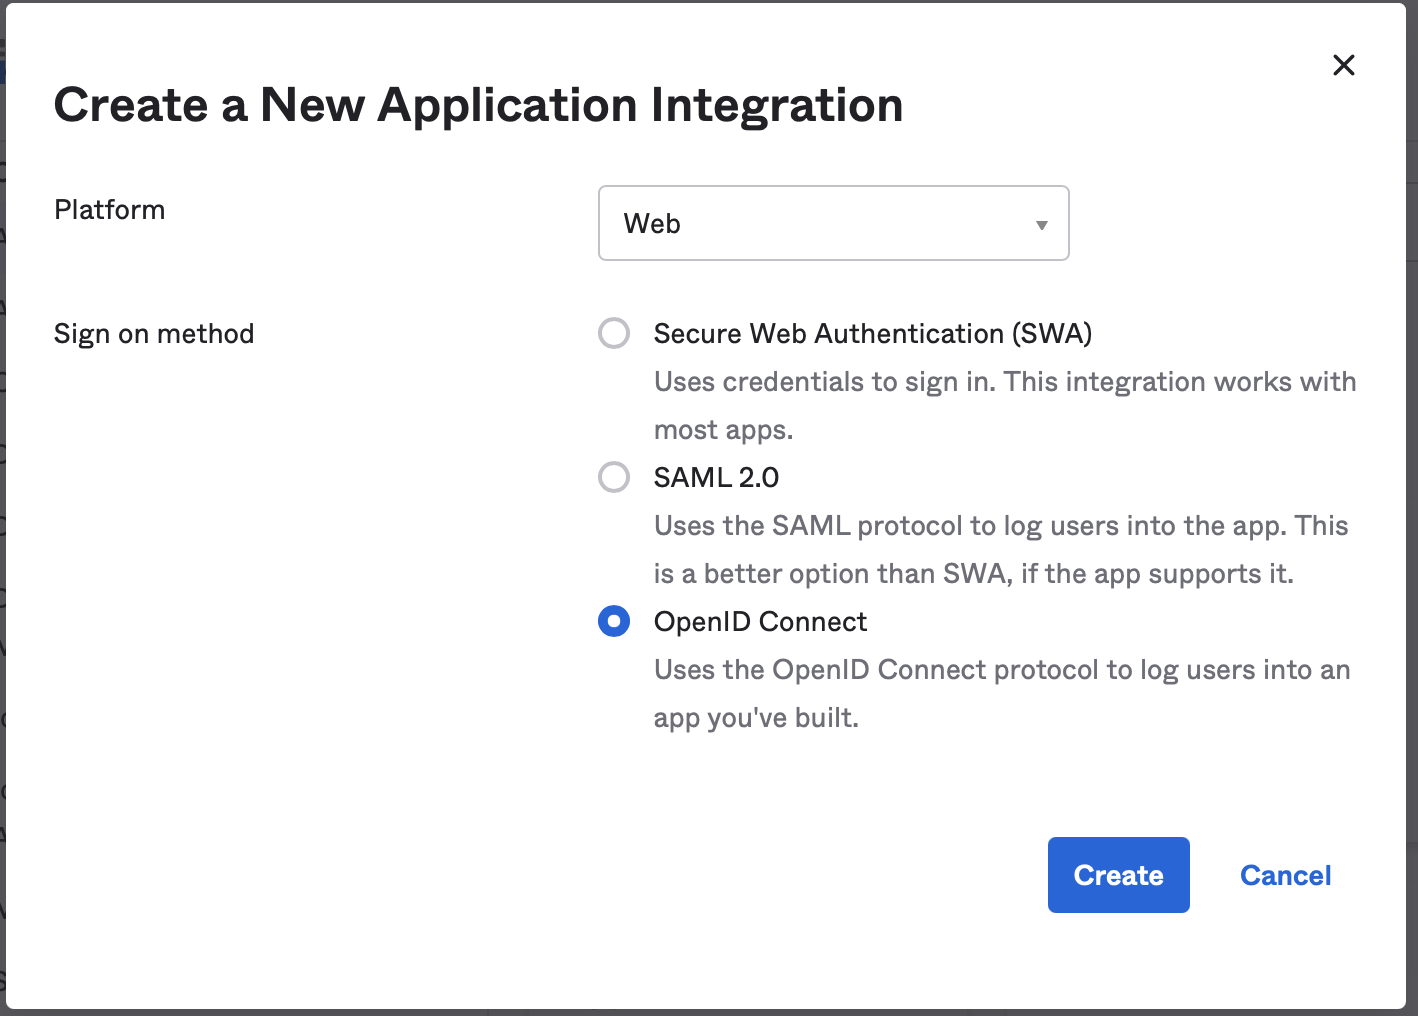
- Set the Platform to Web and Sign on method to OpenID Connect. Then click Create
Update The Application
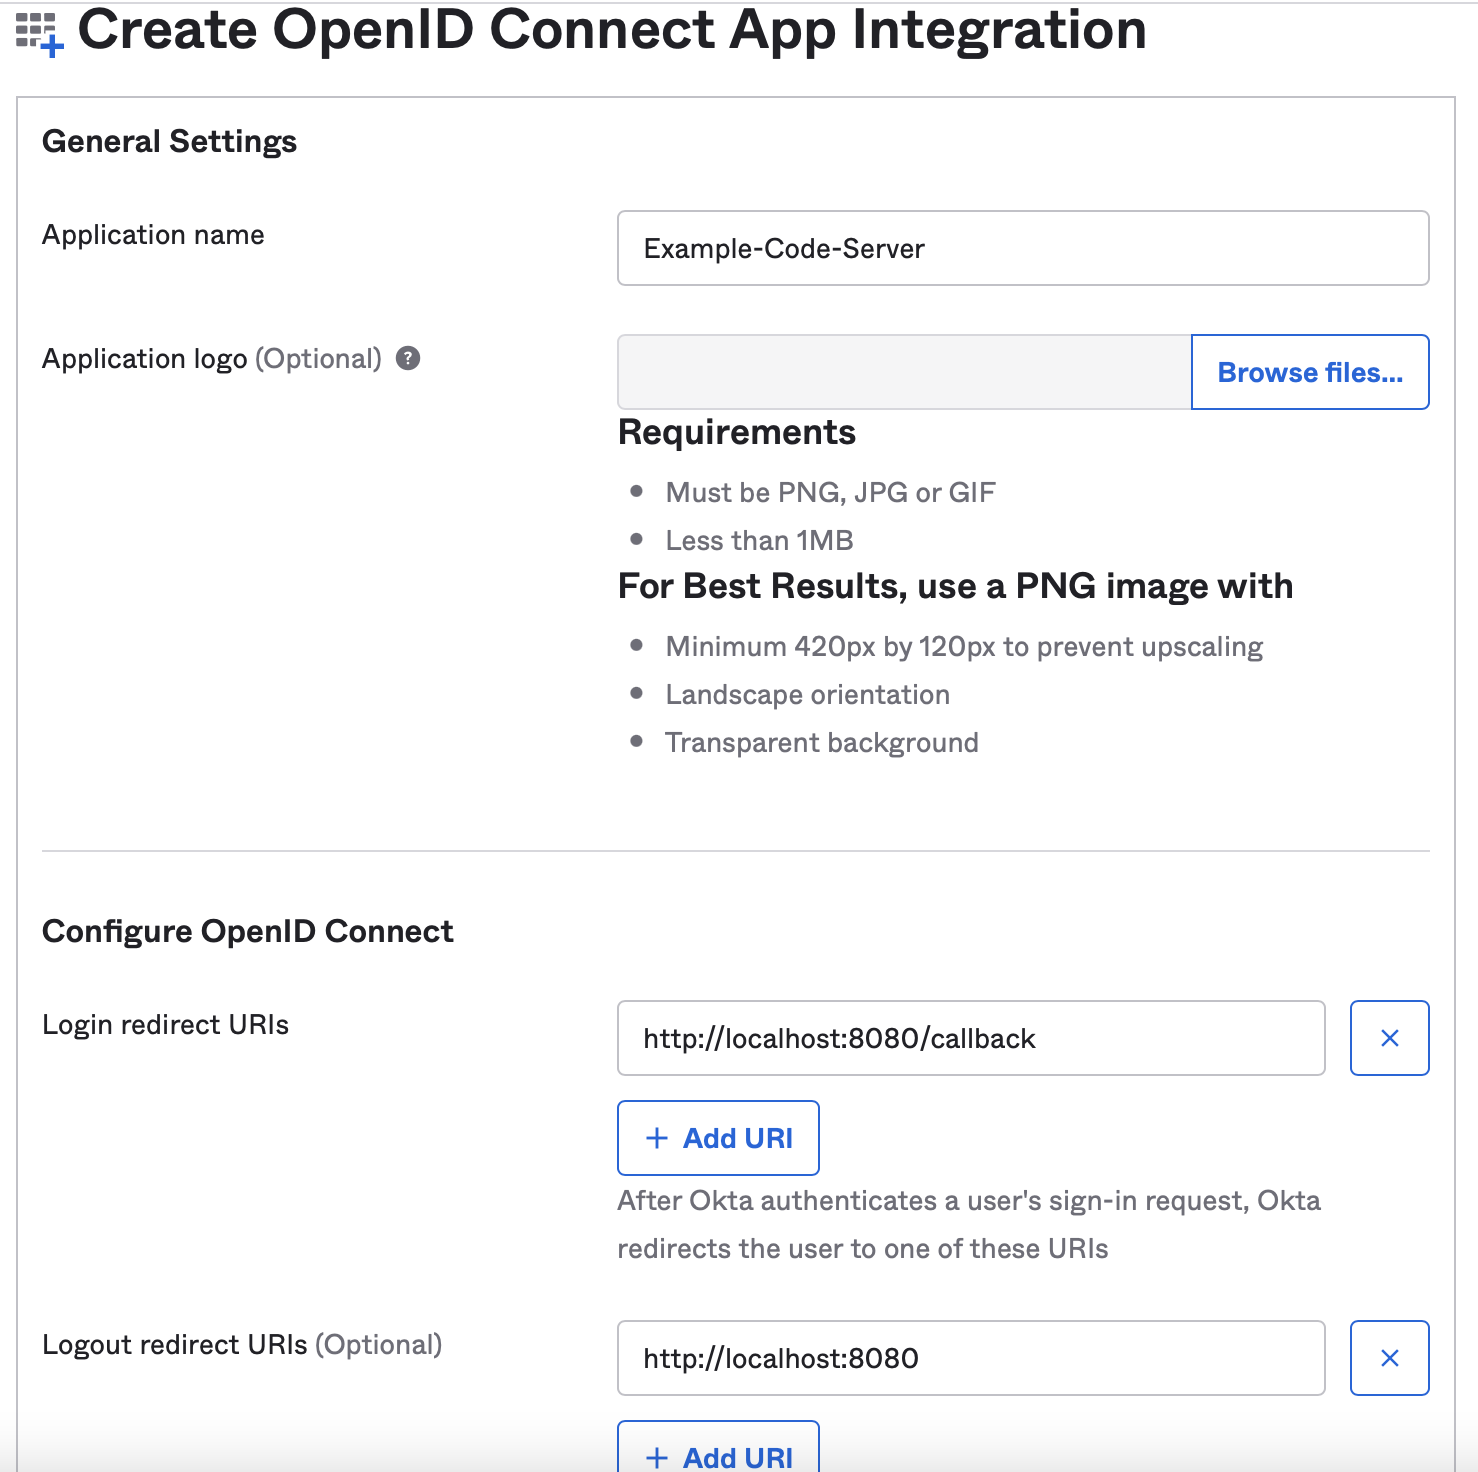
- Update the Application name field with the desired name for this application.
- Update the Login redirect URIs and Logout redirect URIs (Optional) fields so that they point to the correct endpoint then click Save
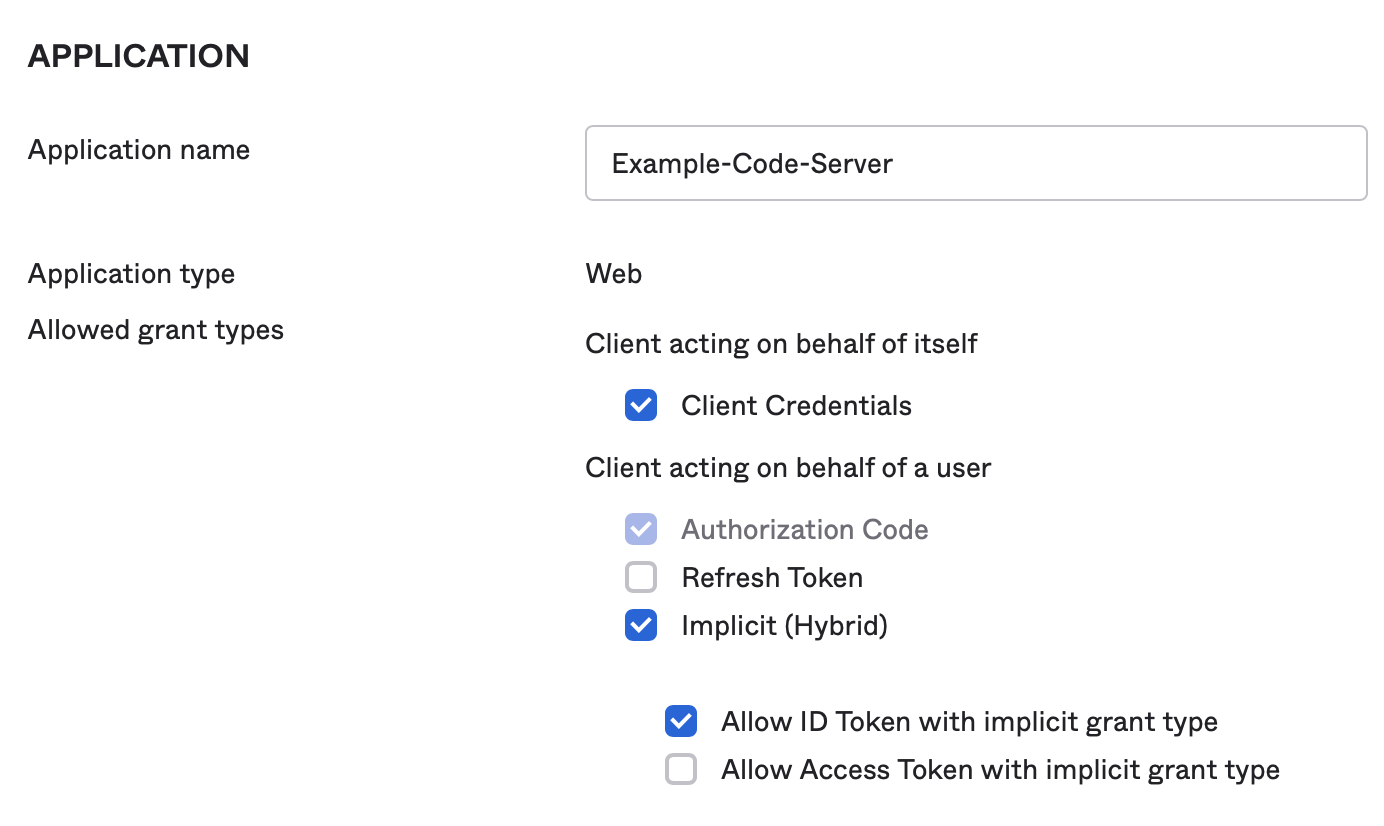
- To update the Allowed grant types start by navigating to the General Settings section and clicking the Edit link in the top right corner of the section card.
- Once in the edit view, locate the Allowed grant types checkbox list and make sure the check the boxs for Implicit (Hybrid) and Allow ID Token with implicit grant type are checked, then scroll to the bottom of the page and click Save.
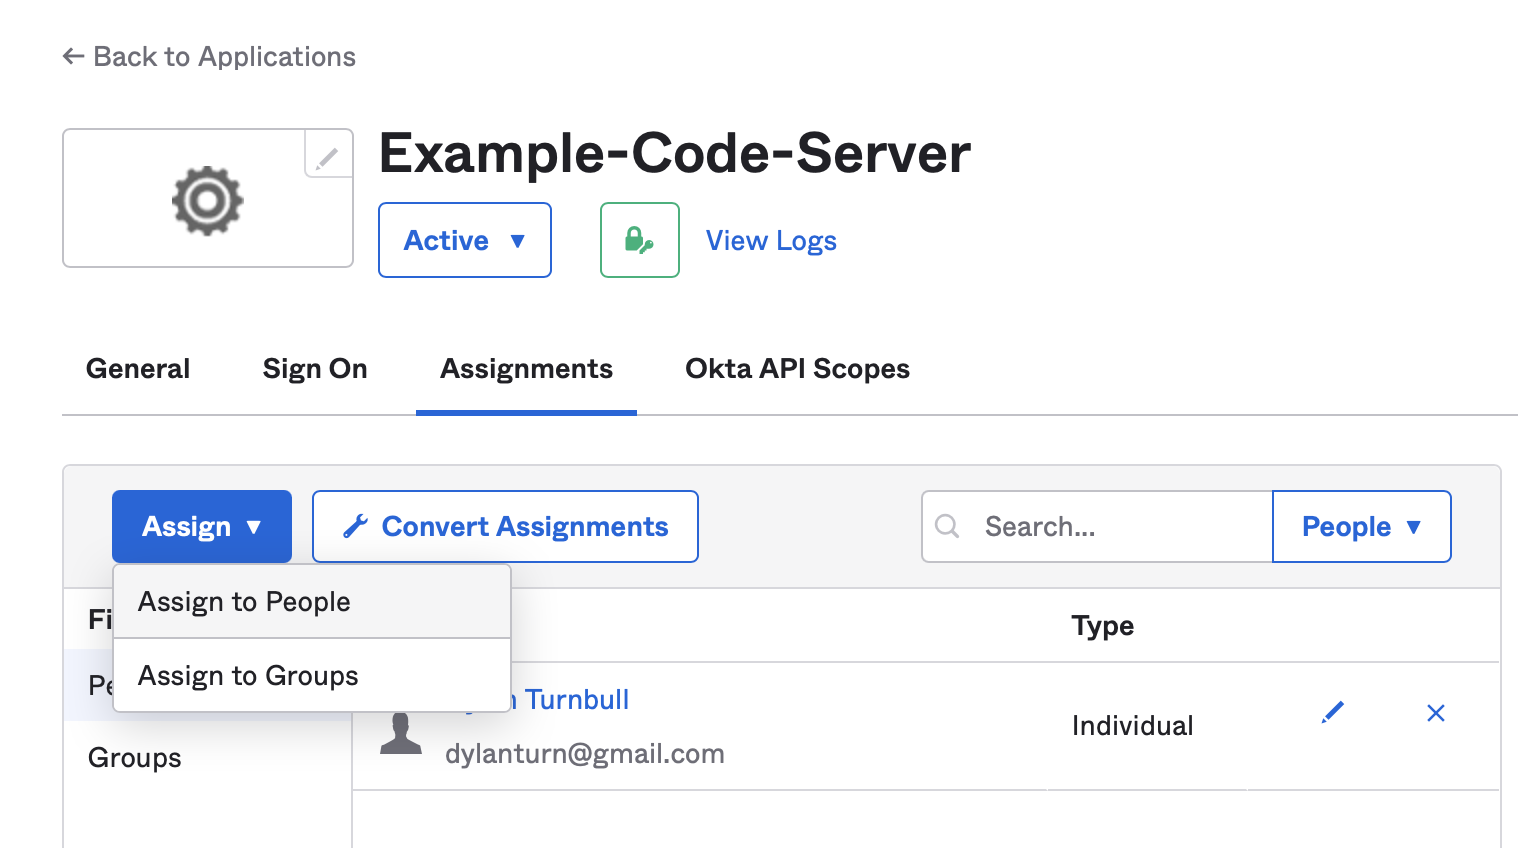
- Lastly, ensure a user is assigned to this application by navigating to the Assignments tab, clicking on Assign, then selecting Assign to People.
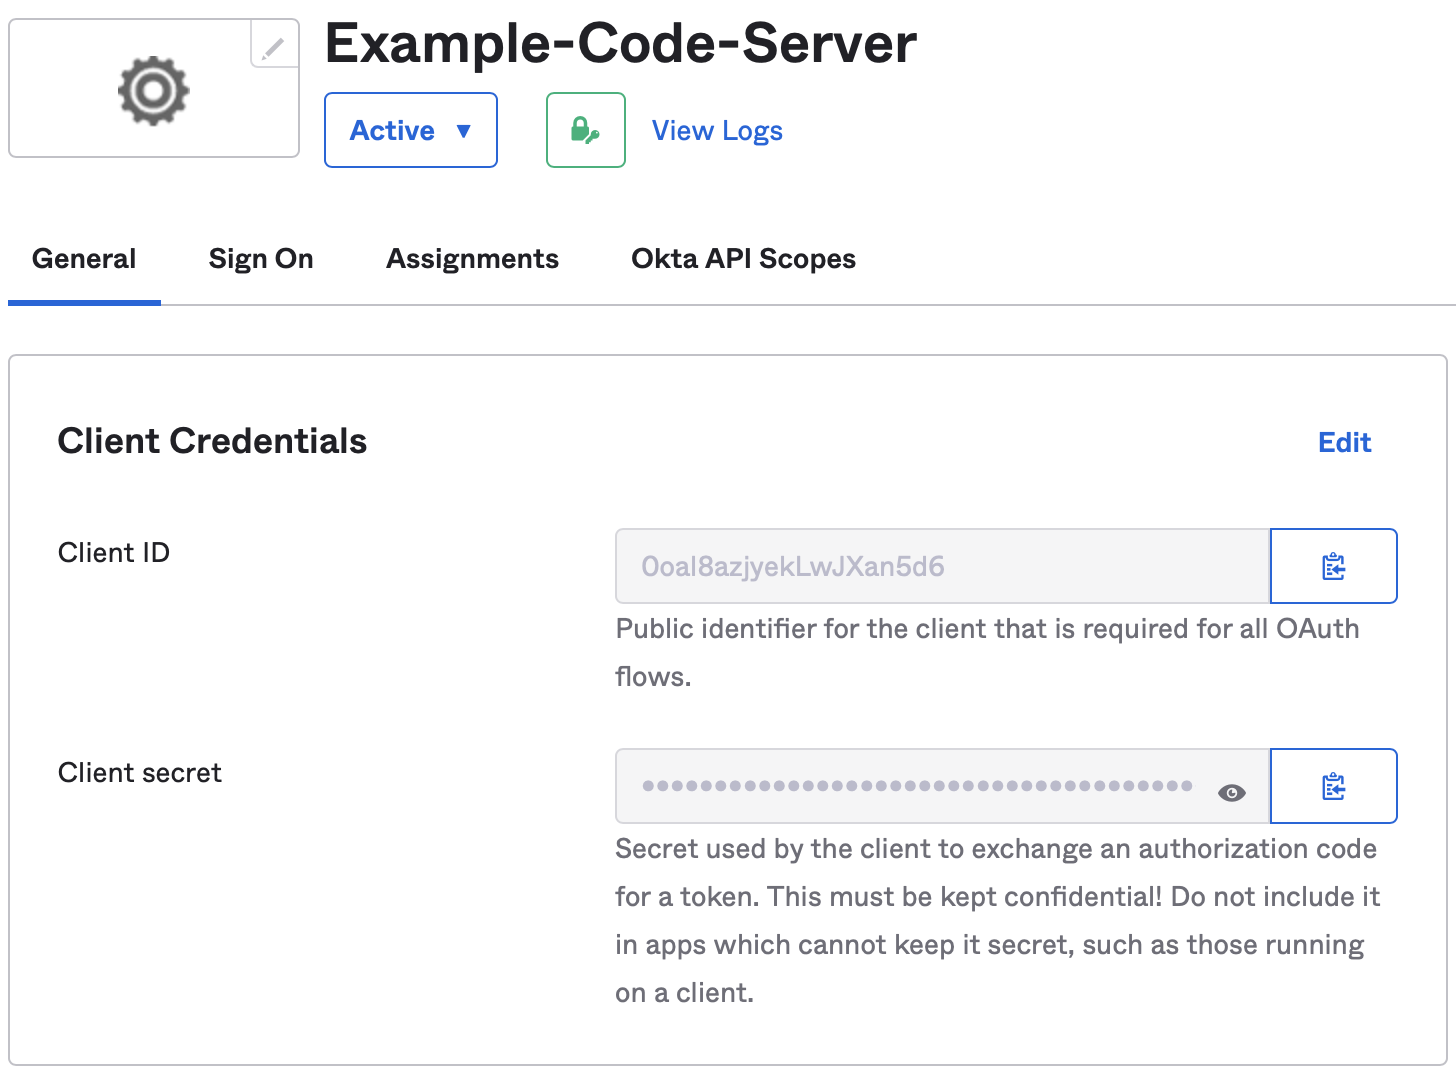
Gather The Client ID
- Make note of the
Client IDvalue. This value will be used in theopenid-client-idconfiguration variable.
Example Configuration
NOTE: The openid-issuer-base-url should be set to the value of the Okta domain field of the Okta application.
bind-addr: 127.0.0.1:8080
cert: false

auth: openid
openid-issuer-base-url: "https://example.okta.com"
openid-client-id: "0oal8azjyekLwJXan5d6"
openid-base-url: "http://localhost:8080"
openid-secret: "{prerequisites_openid-secret_value}"
Keycloak OpenID Connect Client Setup
Creating The Client
- Once logged into the Keycloak instance, navigate to the Clients page by clicking the Clients link in the navigation menu on the left side of the page.
- Begin the client creation process by clicking the Create button located in the top right corner of the clint list.
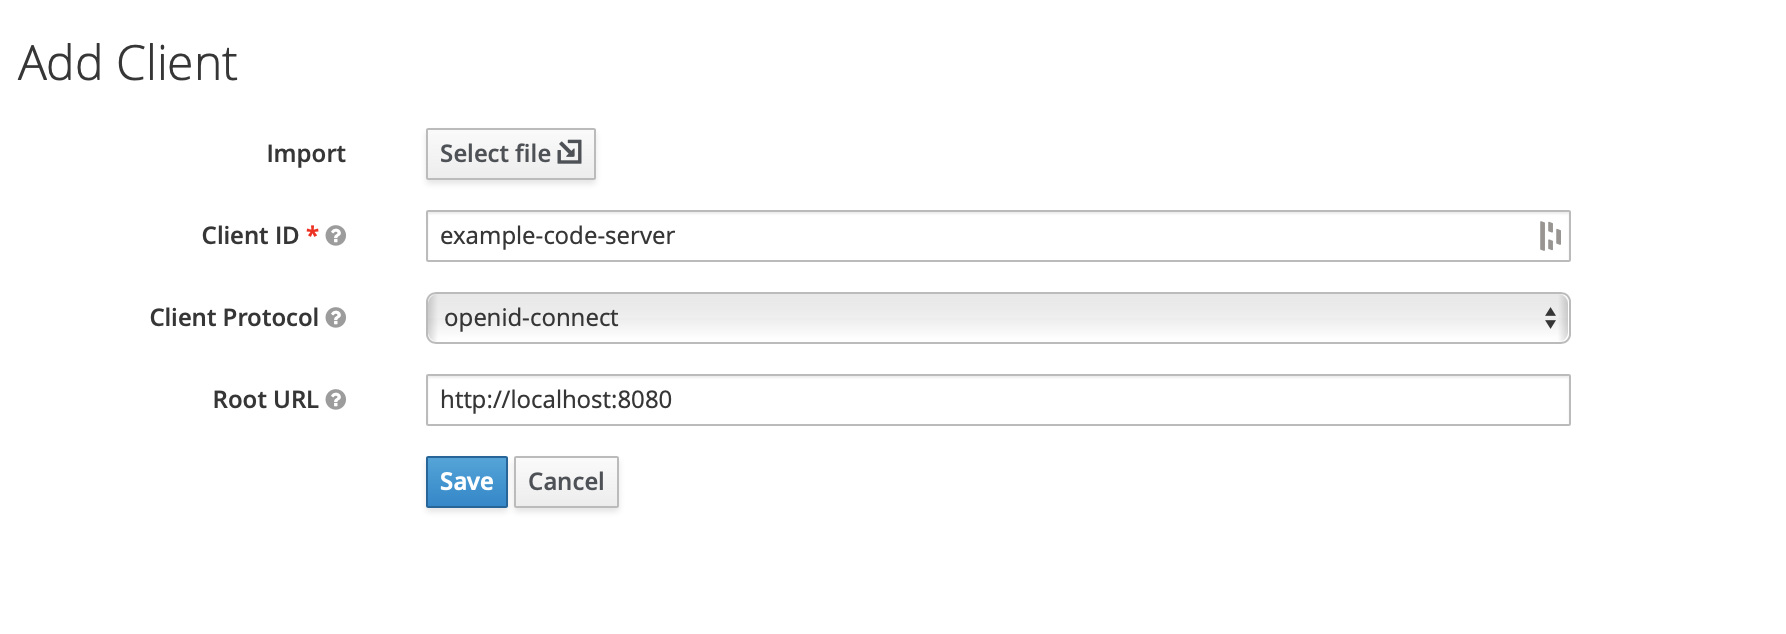
- Fill out the client creation fields then click Save - Client ID: This is the value that will later be populated in
openid-client-id. This value is entirely up the the user or process creating the client. - Client Protocol: This value should be set to openid-connect - Root URL: This field should be populated with the base url of the service it authenticates.
Update The Client Name
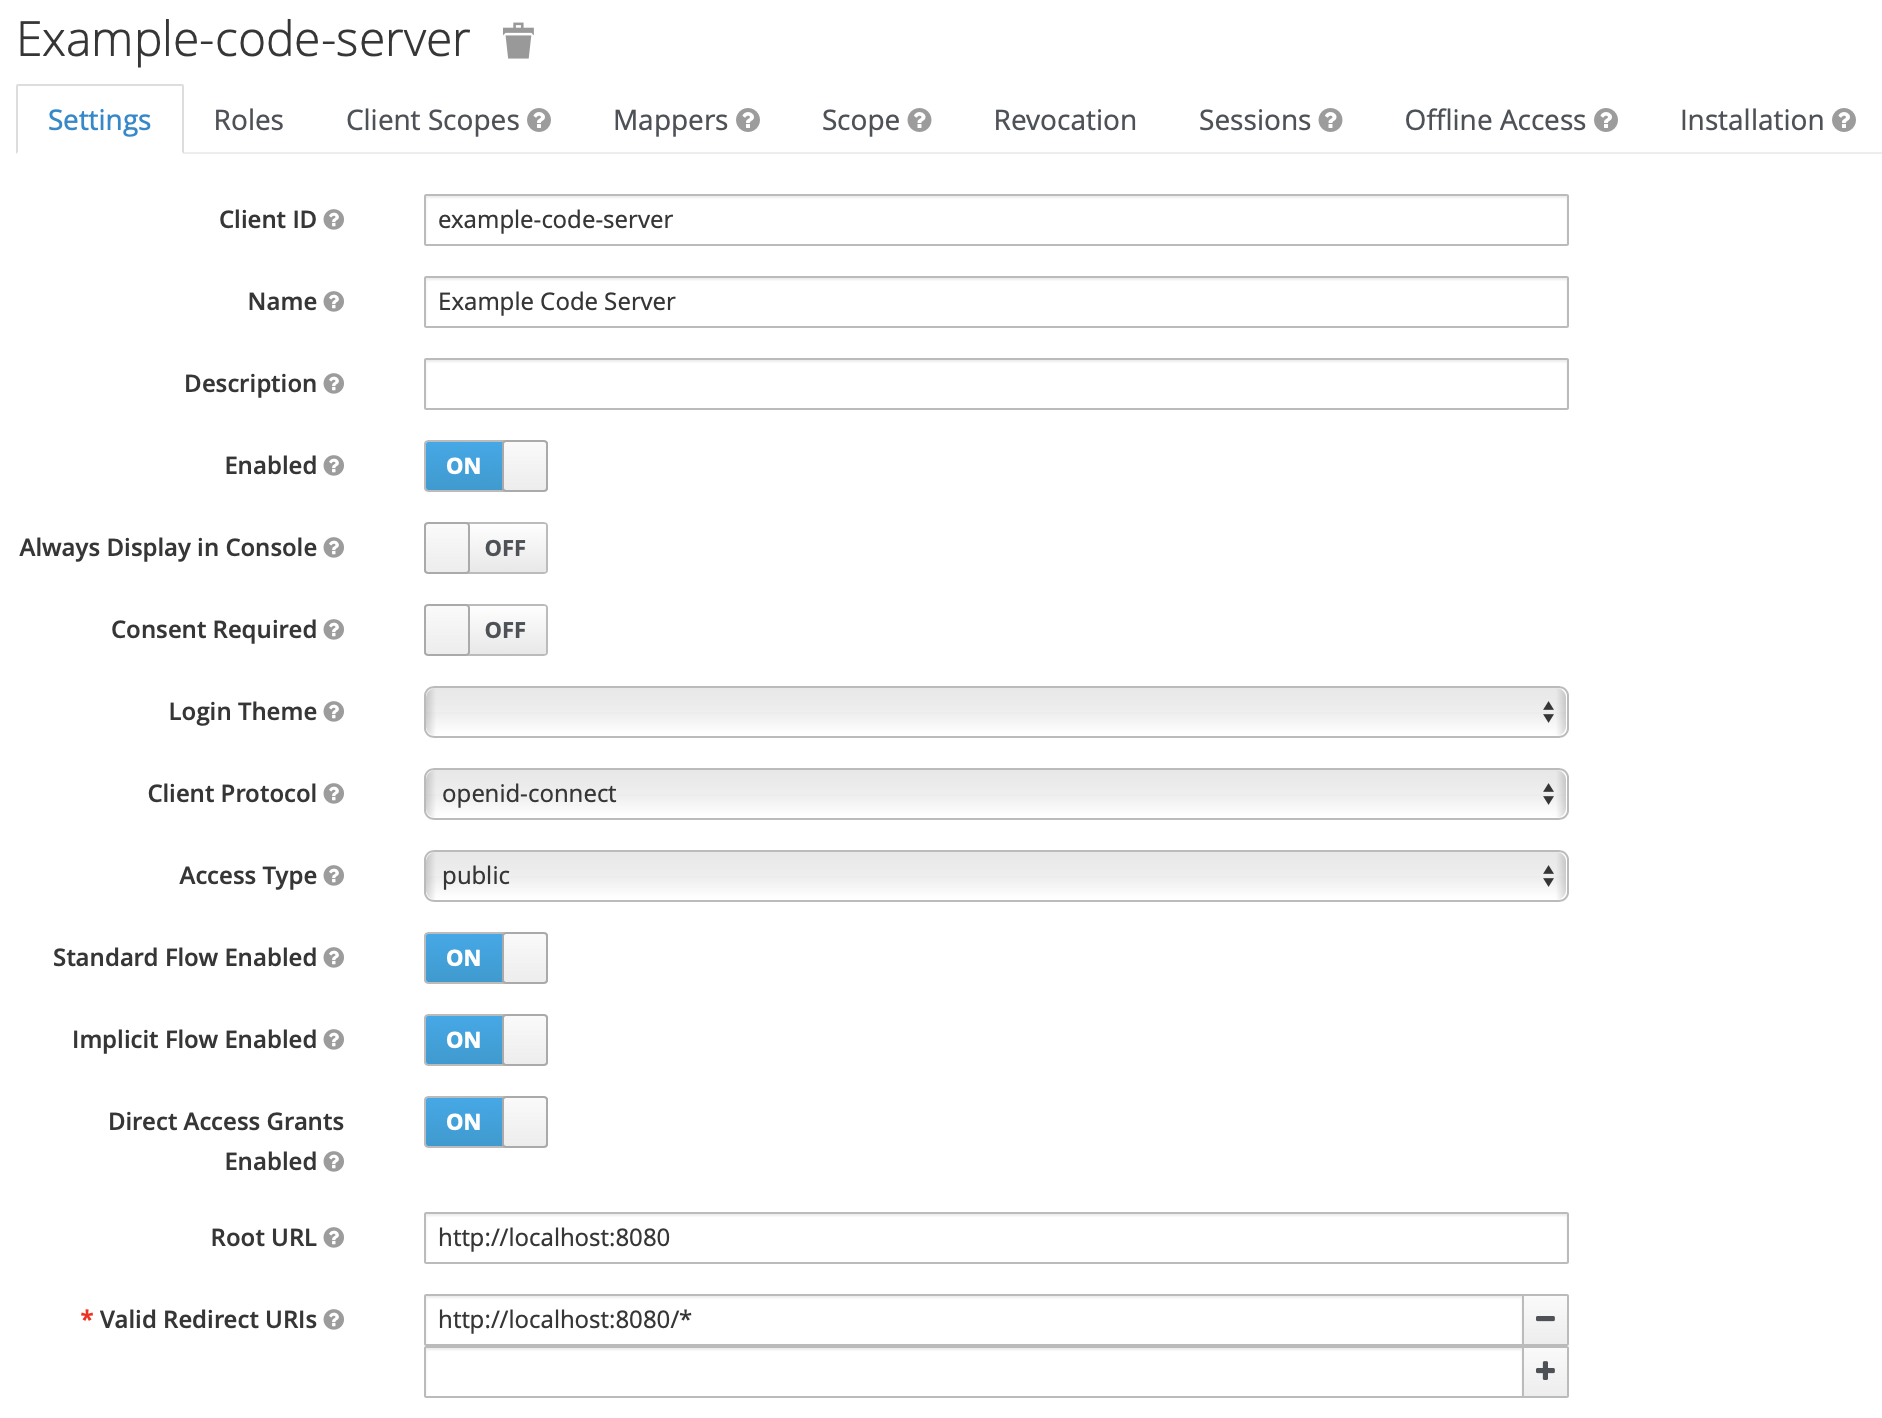
- Once the Save button in the Add Client window has been clicked, the client will be created and the page will be redirected to the client settings view. From inside that view proceed to name the newly create client by populating the Name field.
- Enable implicit flow by changing Implicit Flow Enabled from OFF to ON.
- Scroll to the bottom of the page and click Save.
Example Configuration
NOTE: The openid-issuer-base-url will depend on the Keycloak realm. In the example below the realm is called master.
NOTE: The openid-client-id value should be set to the value given to the Client ID when the client was first created.
# OIDC Configuration Argo will use for authentication and authorization
oidc_config = {
   name                      = var.argocd_oidc_name
   issuer                    = "https://keycloak.local/auth/realms/master/.well-known/openid-configuration"
   client_id                 = "example-for-argocd"
   client_secret             = "{prerequisites_openid-secret_value}"
   requested_scopes          = var.argocd_oidc_requested_scopes
   requested_id_token_claims = var.argocd_oidc_requested_id_token_claims
}